| SSH is a secure
version of the Telnet specification used for
communications on the Internet, where two machines
send information to each other over a secure
connection. SSH is useful to prevent unauthorized
users from gaining access to password and user
information that is sent over the Internet.
There are many
different SSH client programs that can be freely
downloaded on the Internet. However, we recommend
using the following programs for their ease of use
and the functionality that they provide.
For Windows
use use putty or one of the programs listed below:
 |
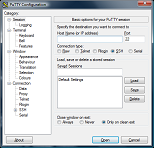
PuTTY
PuTTY is an SSH and telnet client, developed originally by Simon Tatham for the Windows platform. PuTTY is open source software that is available with source code and is developed and supported by a group of volunteers.
You can download PuTTY here.
|
| Bitvise SSH Client |
Bitvise SSH Client
Bitvise SSH Client is an SSH and SFTP client for Windows. It is developed and supported professionally by Bitvise. The SSH Client is robust, easy to install, easy to use, and supports all features supported by PuTTY, as well as the following:
- graphical SFTP file transfer;
- single-click Remote Desktop tunneling;
- auto-reconnecting capability;
- dynamic port forwarding through an integrated proxy;
- an FTP-to-SFTP protocol bridge.
Bitvise SSH Client is free to use. You can download it here.
|  |
MobaXterm
Enhanced terminal for Windows with X11 server, tabbed SSH client, network tools and much more
- Full X server and SSH support
- Remote desktop (RDP, VNC, Xdmcp)
- Remote terminal (SSH, telnet, rlogin, Mosh)
- X11-Forwarding
- Automatic SFTP browser
- Plugins support
- Portable and installer versions
- Full documentation
- Max. 12 sessions
- Max. 2 SSH tunnels
- Max. 4 macros
- Max. 360 seconds for Tftp, Nfs and Cron
You can download the Home Edition for free. Download it here.
|
For Macintosh
EITHER:
- Mac OS10.x -
which is installed by default with every Mac OS 10.x release. It can be found in the Folder "Applications--> Utilities"
To do the SSH connect:
- select "Connect to Server..." from the "File" menu.
- From there, select "Secure Shell (ssh) from the left hand menu
- Clicking the small "plus" button on the left allows the user to type in the server name (name or IP), and the user account name
- Click the "Connect" button at the bottom, and off you go!
Related Page: How to use
Secure FTP to ce.uml.edu |

