Core FTP Lite is a free File Transfer Protocol (FTP) program. If you know how to download and install programs, skip to the section: Uploading
files using Core FTP Lite.
Install Core FTP Lite
- Download Core FTP Lite.
- Select "Save this file."
- Save the file to your desktop.
Note: If you cannot choose where to save the file, it will be in your downloads folder.
- Click "Close" when the download is complete.
- To install the program, Double-click the installer icon on your desktop (or in your downloads folder).
- Proceed through the installation process.
Configuring Core FTP Lite
-
Start the program by selecting Start > All Programs > Core FTP Lite.
Please note: if you are using Windows 8.1, navigate to the START screen by selecting the icon on the lower left part of the screen. Type "Core FTP" in the search box. Select "Core FTP LE" in the search results and pin it to your screen or the task bar. Going forward the program will be available to start from your chosen location. Select the Core FTP LE icon to start the program.
-
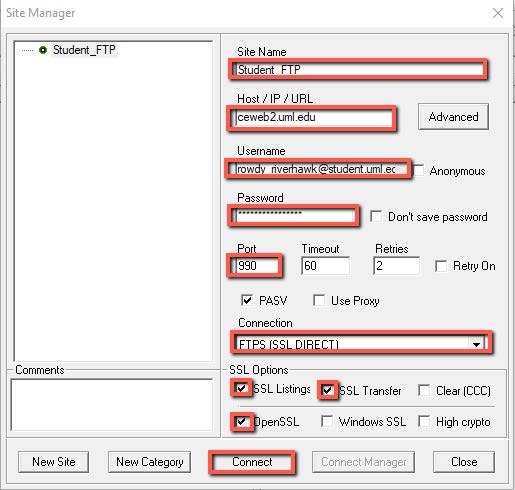
Setup a server profile in the Site Manager box.
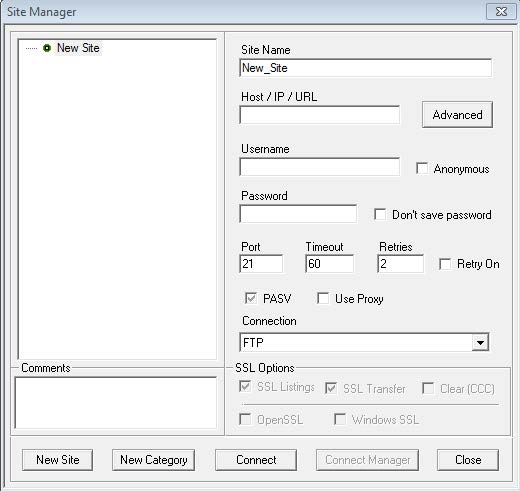
- Type the following information into the fields provided:
- Site Name:
student_ftp
- Host / IP / URL:
ceweb2.uml.edu
- Username: your student email
- Password: your student email password
- Port:
990, Timeout: 60, Retries: 2
- Connection: choose FTPS (SSL DIRECT) (We use FTP over SSL or TLS)
- SSL Options: check SSL Listings, SSL Transfer, and OpenSSL
- Select Connect. This connects to your directory on the FTP server.
- When the certificate window appears, choose Always Accept.
- You should see your directory on the ceweb2.uml.edu FTP server.
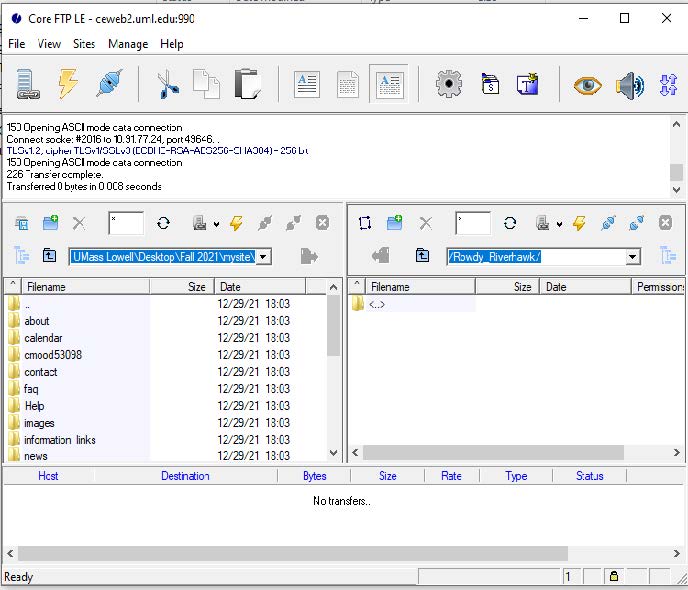
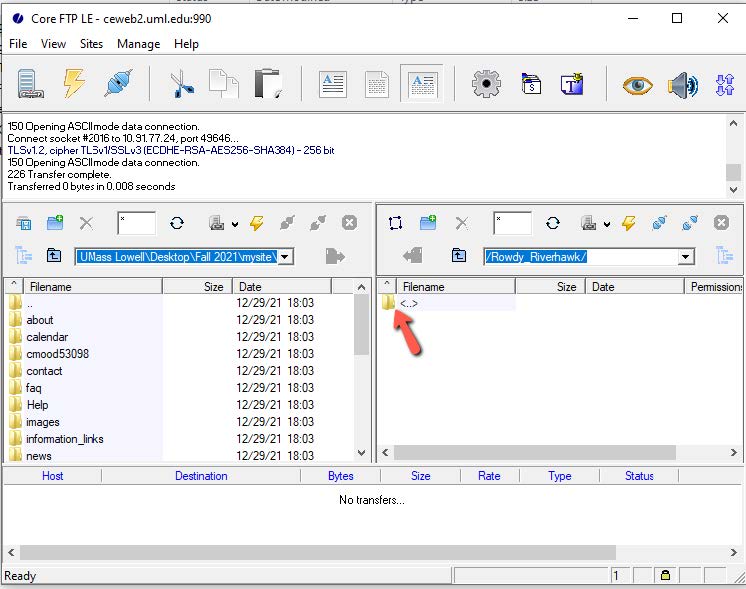
*Please note: If your instructor requires you to download files from a course directory on the server, double click the <..> icon in the right side of the window. Select the folder with the number that corresponds to your course (ex. 90.230.031).
Upload or Download Files with Core FTP Lite
Upload Files
- Start Core FTP Lite and connect to the server.
- To upload files to the server, select all files you wish to upload from the window on the left and click the right-arrow button.
Download Files
- To download* files from the server to your computer, select all files you wish to download from the window on the right.
- In the left window, select the location on your computer where you wish to save the files.
- Click the left-arrow button to download to that location.
*If your instructor requires you to download from the course directory, open the corresponding course number before downloading.
How do I view the web pages I've uploaded?
Note: Your homepage must be named "index.htm" or "index.html".
- Start your web browser (Edge, FireFox, Google Chrome etc.).
-
In the URL box enter a web address using this format:
https://ceweb2.uml.edu/username*/index.html
*Your username is the first part of your student email.
Example: If Rowdy Riverhawk is taking a class, they should type
https://ceweb2.uml.edu/rowdy_riverhawk/index.html
Reminder: You must be on the UML VPN to view your pages on the FTP server.
Trouble uploading files?
If you have trouble uploading files, speak to your instructor, call 978-934-2467 or email onlinelearning@uml.edu for Tech Support. Note: You can only access student FTP if your class requires it.